Files Needed
.NET Core 3.1 Desktop Runtime (v3.1.0)
We cannot supply you with the Gundam Evolution files. If you previously had the game installed on steam, you can redownload it from your library. If you never owned the game…
you may have to get creative.
Video Guides - Unpack, Launcher, AES finder, and match finder
Unpack Process
Step 1
Download the Launcher and the unpacking/AES tools and place them in a new folder to work out of. Extract the tools here.
Step 2
Extract both “ScyllaHide2023-03-24_13-03.zip” and “snapshot_2024-03-27_00-26.zip”
In the extracted ScyllaHide folder, navigate to “ScyllaHide_2023-03-24_13-03\x64dbg\x64” and copy the plugins folder (the entire folder, not just the contents)
Now head to the extracted Snapshot folder and navigate to “snapshot_2024-03-27_00-26\release\x64”. Paste the plugins folder from ScyllaHide here
Step 3
Inside the x64 folder, we are now going to run the program “x64dbg.exe”, if you do not see this program, try turning on file extensions by going to the view tab at the top of the file explorer window and checking the box for “file name extensions”
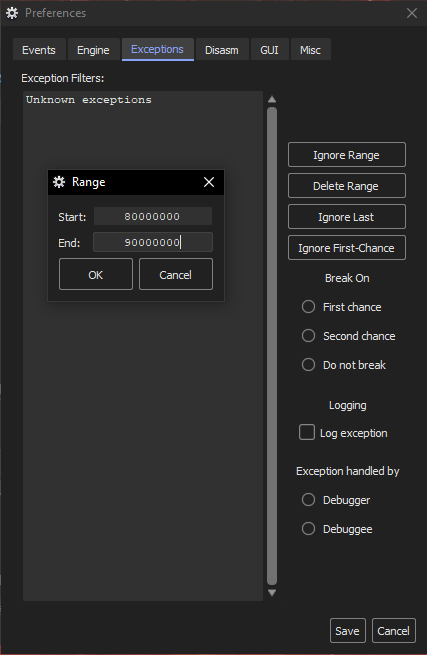
Once you have the debugging program running, go to the options tab and click on preferences. In the “Events” window, uncheck every box and then move to the Exceptions tab.
Here we want to click “Ignore Range” and set the start value at “80000000” and the end value at “90000000”, then click save and restart the debugger
Step 4
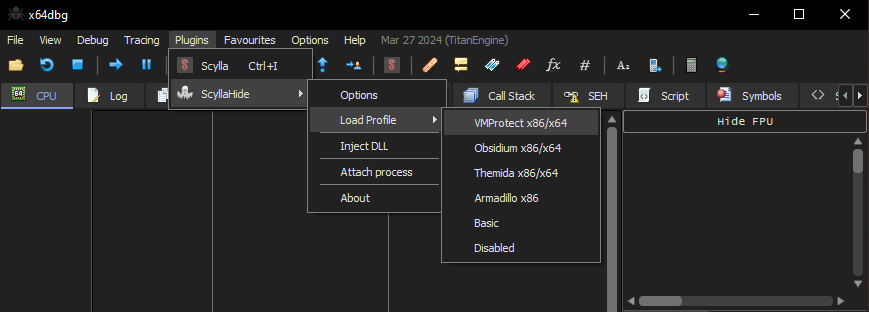
Go to the plugins tab, ScyllaHide, Load Profile, and then select either VMProtect or Obsidium (If there are issues try using the other for troubleshooting). After selecting, a window will pop up saying “Please start the target to apply changes”.
Step 5
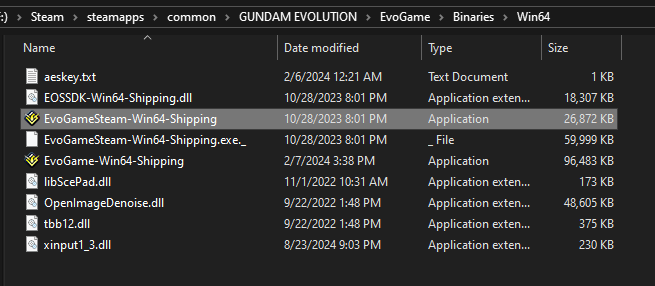
Now click File and open, then navigate to the shipping EXE from within your Gundam Evolution installation folder. This is not the “EvoGameSteam” EXE in the top folder of the installation, but the “EvoGameSteam-Win64-Shipping” EXE located in the Win64 folder.
This should be in a file path similar to
“Steam\steamapps\common\GUNDAM EVOLUTION\EvoGame\Binaries\Win64”
Step 6
With the shipping EXE in the debugger, click on the Script tab. Right click anywhere in the empty window, and select Load Script, and open. Navigate to where you extracted the Unpacking tools and load the “unpack_script” Once loaded, click run or hit spacebar to start. You should see the GEVO splash screen followed by a “Script Finished” popup. This could take a few seconds depending on your PC.
Step 7
Click the refresh button, the blue icon with a circular arrow in the top left corner. Then go back to the script tab and run the script again. You should get a new popup saying you are now ready to unpack the game using Scylla. Press OK and you will be brought to the Scylla window
Click “IAT Autosearch”, it will take a few moments before another window pops up asking for a Advance Scan result, click NO. Then an IAT window will pop up and press OK to continue. Now press the “Get Imports” button on the Scylla window. It will take a moment for this process to run.
Once Scylla finishes the process, scroll through the imports window and remove any line with a red X by right clicking and clicking delete. Then click Dump and create a new folder where you want to save this dump. Back in the Syclla window, click “Fix Dump” and open the file/dump that you just saved. This will create a new file in your dump folder "called “EvoGameSteam-Win64-Shipping_dump_SCY.exe”. In the Scylla window, you now want to click “Pe Rebuild” and select the newest file that was just created.
Step 8
You can now close the debugger, you should have 3 similar looking files in your dump folder. With this folder open, reopen the folder where you placed the unzipped Side7 tools. Drag the “EvoGameSteam-Win64-Shipping_dump_SCY.exe” file on top of the “Unpacker” application in the tools folder. This will create a new “EvoGameSteam-Win64-Shipping.EXE” file in the dump folder. Copy this file and paste it in the Win64 folder inside of your Gundam Evolution installation from before.
Congratulations! the hardest part of the installation is over!
aes key finder
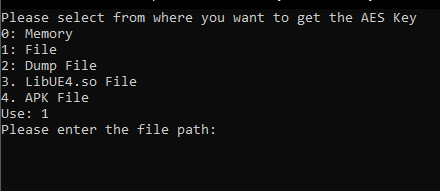
The rest of the setup process is significantly easier. After downloading .NET Core 3.1 Desktop Runtime (v3.1.0) from the link at the top of this page and running the program, return to the tools folder used from the unpacking process. Unzip the “UEAESKeyFinder” folder if you have yet to do so. Run the UEAESKeyFinder application located in this folder and a command window will open. Press 1 and hit enter and you will be prompted to enter the file path for the shipping EXE that was created with the unpacker. You can manually drag the “EvoGameSteam-Win64-Shipping” file onto the command window to automatically fill the path info. Press enter and save the AESkey information for the Side 7 launcher
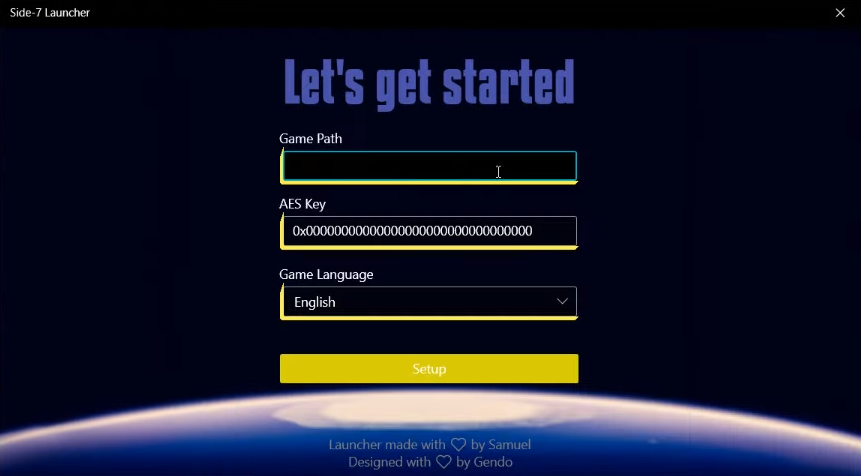
Run the “Launcher.UI” application, this is what you will use each time you want to launch Gundam Evolution. Choose which log in method you prefer, either Steam or Discord.
For game path, input the location of your Gundam Evolution folder. This should be similar to C:\Steam\steamapps\common\GUNDAM EVOLUTION depending on which drive you have the game installed on.
For the AES key, you will input the key given to you from the UEAESKeyFinder application
Finally choose which language version of the game you want the launcher to run. This will effect the text and voice lines you see and hear in game.
Click setup to finish the installation
Launcher Setup
finding matches
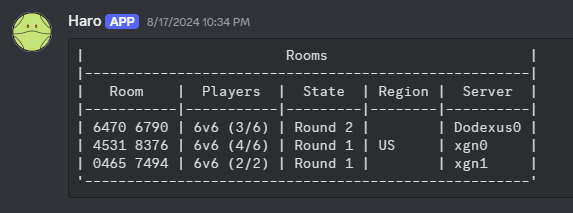
Until the Side 7 team finishes work on a matchmaking system, matches are made through creating custom lobbies and using lobby codes. To facilitate this process there are two discord channels on the Side 7 server.
used to view lobbies, match status, and server info
Commands:
/room list - get a list of all active lobbies and their status /server list - get a list of all active servers, their location, and status
used to organize matches and ping users for joining matches
Commands:
@Custom Rooms - will ping all users with the custom room role assigned
We understand this setup can be a bit tricky to go through and troubleshoot. We are more than happy to help people through this process, so please feel free to reach out to us on the discord through the Installation Help channel.


